
Using a baby carrier hip seat can transform how you navigate daily life with your little one, especially when running errands or walking through busy areas in the Philippines. However, ensuring your child is positioned correctly is not just a matter of comfort—it is a critical safety requirement. A properly adjusted baby carrier hip seat distributes your baby’s weight evenly across your body while supporting their developing spine and hips in an ergonomically sound position.
To position your baby correctly, you must secure the carrier’s waistband firmly around your natural waist, sit your baby fully on the center of the shelf, ensure their legs form a healthy “M-position” where their knees are higher than their bottom, and keep their airway completely clear. This guide breaks down these steps in detail so you can carry your baby confidently and comfortably.
Before You Start: Checking Readiness and Gear
Before you place your baby into a baby carrier hip seat, you must verify that they are developmentally ready for this style of baby gear. Unlike soft structured wraps or structured newborn carriers, a hip seat carrier features a firm, protruding shelf that changes how your baby’s weight is distributed. Typically, babies should not be placed on a hip seat until they have developed strong, independent head and neck control and can sit upright with minimal support. Using a hip seat too early can cause your baby to slump, which risks compressing their developing spine and compromising their airway. Always read the manufacturer’s documentation for your specific carrier model to verify the minimum age, weight, and developmental milestones required, as these specifications vary significantly across different brands and designs. Never assume a carrier is safe for your baby based solely on its product category or marketing name.
Products mentioned in this guide
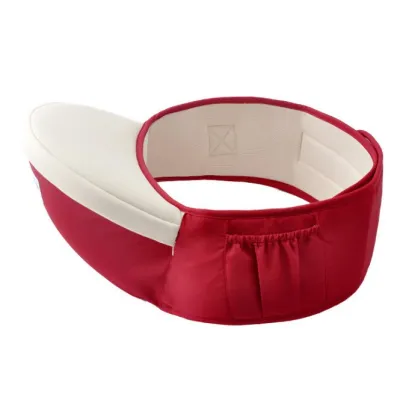
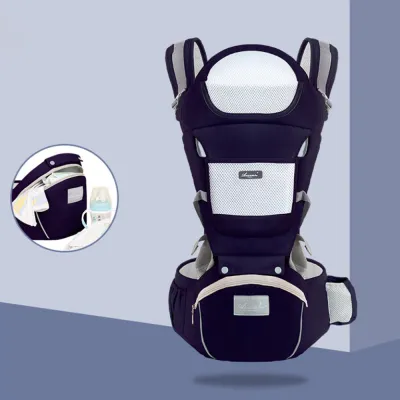


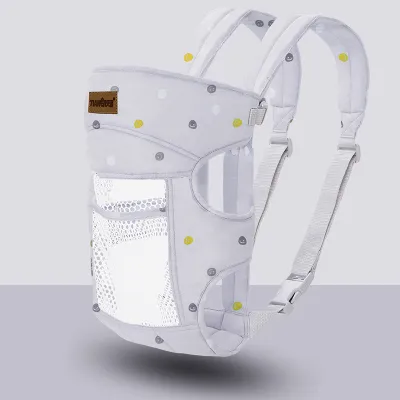

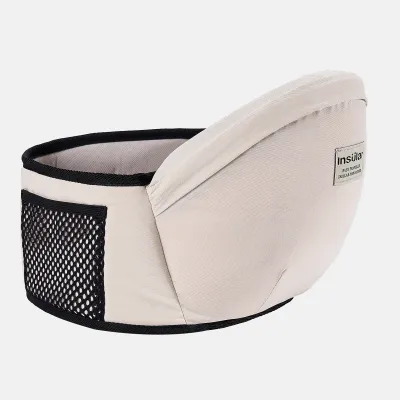
Prices are valid at publication and may change. Please refer to the product page for the latest price.
Next, conduct a thorough gear inspection before every single use. Examine the waist belt, buckles, velcro strips, and the internal structure of the seat itself. Look closely for frayed stitching along the seams, cracks in plastic buckles, or weakened velcro that has accumulated lint or fibers. The fasteners must lock securely with an audible click, and the velcro should grip tightly without slipping under pressure. If you detect any signs of wear, tearing, or structural weakness, do not use the carrier; instead, contact the manufacturer or a qualified professional for repair or replacement options.
Finally, consider how you dress your baby for a day in the carrier, particularly when dealing with the warm, humid climate of the Philippines. Wearing a carrier adds a significant layer of insulation around both you and your baby, which can rapidly raise your baby’s core body temperature. Dress your little one in lightweight, breathable fabrics like thin cotton or bamboo, and avoid heavy layers or footed onesies that can pull tightly against their toes when their legs are bent. Ensuring your baby is dressed appropriately helps prevent heat rash, dehydration, and general discomfort during your outings.
Step-by-Step: Positioning Your Baby in a Baby Carrier Hip Seat
The foundation of a safe carry begins with how you secure the base of the baby carrier hip seat. Before picking up your baby, position the wide waistband high on your natural waist, rather than low on your hips, unless your specific product instructions state otherwise. Fasten the velcro snugly, then secure the safety buckle, pulling the strap tight so the belt fits firmly against your body. The seat platform should sit level and stable, directly above your pelvic bones; if the belt is too loose, the weight of your baby will cause the seat to sag outward, pulling on your lower back and creating an unsafe, tilting angle for your child.

Once the base is securely fastened, gently lift your baby and place their bottom fully onto the center of the seat platform. Make sure they are not sitting too far forward on the edge or leaning precariously to one side. Their weight should be centered directly over the support shelf, which allows the carrier to absorb and distribute the load as designed.
With your baby centered, you must immediately check their leg placement to achieve the ergonomically vital “M-position,” also known as the frog-leg position. In this stance, your baby’s knees should be bent and positioned slightly higher than, or at least level with, their bottom, while their thighs are fully supported by the seat platform. This position keeps the head of the femur securely inside the hip socket, reducing the risk of hip dysplasia. If your baby’s legs are hanging straight down, or if the seat is too narrow to support their thighs, their hips are under unsafe strain. If you have any concerns about your baby’s hip development, or if they consistently seem uncomfortable in this position, consult a pediatrician or a pediatric physical therapist for professional guidance.
Next, evaluate your baby’s upper body support. If your hip carrier features an attachable back panel or shoulder harness, pull the panel up over your baby’s back and secure the buckles snugly, ensuring it supports their spine without forcing it into an unnaturally straight line. The spine should maintain a gentle, natural “C-curve.” If you are using an open, standalone hip seat without a back panel, you must keep at least one arm wrapped securely around your baby’s back and neck at all times to prevent them from suddenly arching backward or slipping off the platform.
Airway protection is the most critical safety check of all. Ensure your baby’s face is completely visible and uncovered by any fabric, clothing, or your own body. Their chin must not rest on their chest, as this “chin-to-chest” position can restrict their airway and lead to positional asphyxia. Keep a clear space of at least two fingers’ width between their chin and chest, and regularly verify that they are breathing easily and quietly.
Adjusting Your Posture to Prevent Back Strain
Carrying a growing baby can take a toll on your body, but adjusting your posture and the carrier’s fit can significantly reduce physical strain. Start by optimizing the waist belt placement. Positioning the belt high on your natural waist allows the wide, padded band to transfer the bulk of your baby’s weight directly to your hips and legs, which are much better suited for load-bearing than your delicate lumbar spine. If the belt slips down, it will pull your pelvis forward, leading to lower back fatigue and muscle strain.
If your baby carrier hip seat includes shoulder straps or a back harness, adjust them carefully to distribute the remaining weight evenly across your upper back and shoulders. The straps should feel snug but comfortable, resting flat on your shoulders without digging into your neck or restricting your breathing. Adjust the chest or back clip so it sits in the middle of your shoulder blades, which keeps the straps from slipping off your shoulders.
Paying close attention to your body mechanics is equally important. When carrying a baby on a hip seat, parents often unconsciously lean backward or arch their lower back to compensate for the front-loading weight. This posture puts immense pressure on your lumbar vertebrae and can lead to chronic back pain. Instead, keep your core muscles engaged, stand tall with your shoulders relaxed, and maintain a neutral spine. Avoid twisting sharply at the waist while carrying your baby; if you need to turn, move your entire body by pivoting your feet.
If your carrier design allows for side-carrying, make it a habit to alternate the hip side periodically during long outings. Carrying your baby on only one side for extended periods can cause muscle imbalances, uneven spinal strain, and localized fatigue. Swapping sides every 20 to 30 minutes balances the physical load across both sides of your body, keeping you comfortable and energized during longer walks or family trips.
Final Safety Checks and When to Stop Using the Carrier
Before you set off on your walk, perform a quick, systematic safety check to ensure your baby is secure. Use the standard safety guidelines adapted for hip seats: verify that the waistband is tight and level, your baby’s face is fully visible and close enough to kiss just by tipping your head down, their chin is safely off their chest, and their back is adequately supported. This quick routine takes only a few seconds but provides invaluable peace of mind.
A vital rule for standalone hip seats is the “one hand” rule. When using a hip seat that does not feature a full, structured wrap-around back panel, you must always keep at least one hand on or immediately near your baby’s body. Babies can move suddenly, and without a back panel to hold them in place, a quick wiggle or startle reflex can cause them to lose balance and fall from the seat.
While carrying, monitor your baby regularly for any signs of physical distress. In the hot and humid weather of the Philippines, keep a close eye out for signs of overheating, such as excessive sweating, flushed cheeks, rapid breathing, or unusual lethargy. Additionally, check their legs and feet to ensure the carrier is not restricting their circulation; look for cold feet, a bluish or pale tint to the skin, or deep, dark red marks left by the edges of the seat. If you notice any of these signs, take your baby out of the carrier immediately to let them cool down and stretch.
Knowing when to stop using the carrier is just as important as knowing how to use it. You must discontinue use if your baby exceeds the manufacturer’s maximum weight or height limits, as overloading the carrier can cause structural failure or severe physical strain for you. Additionally, stop using the carrier if you experience sharp or persistent back, hip, or shoulder pain, or if your baby shows persistent signs of discomfort, fussiness, or resistance to being carried. Your comfort and your baby’s safety must always come first.
Frequently Asked Questions (FAQ)
Can I use a hip seat carrier for a newborn?
Standard hip seat carriers are generally not suitable for newborns because very young infants lack the necessary head, neck, and trunk control to sit safely on a firm platform. Placing a newborn on a hip seat can cause severe slumping, which poses a serious risk of airway obstruction and spinal strain. Always consult your specific product’s manual before use; some brands offer specialized newborn inserts or require the baby to reach a specific age, weight, and developmental milestone before using the hip seat function.
How long can my baby stay in the hip seat carrier at one time?
There is no universal time limit for how long a baby can stay in a hip seat carrier, but it is best to take regular breaks every 30 to 45 minutes to check your baby’s temperature, circulation, and overall comfort, especially in hot weather. The ideal duration depends heavily on your own physical comfort and your baby’s tolerance. If you begin to experience muscle fatigue or if your baby shows signs of restlessness, fussiness, or overheating, take your baby out of the carrier to let both of you rest and stretch.
Community discussion
Share your experience or ask a question. Comments are reviewed before publication.