
To correctly install your Jovie kids car seat, you must secure it using either your vehicle’s built-in ISOFIX anchors or the vehicle’s three-point seatbelt system, following the exact routing paths indicated on the seat shell. A secure installation means the car seat moves less than one inch (2.5 centimeters) at the belt path when tested with a firm shake. Achieving this level of stability requires careful preparation, selecting the correct installation method for your vehicle, and performing physical checks to verify a tight fit before every trip. Taking the time to understand these steps ensures your child remains properly protected during transit.
Before You Begin: Preparation and Safety Checks
Before attempting to install your Jovie kids car seat, you must verify that the specific model is fully compatible with your vehicle’s seating positions. Start by cross-referencing the compatibility charts in your car seat manual with the seating guidelines in your vehicle owner’s manual. Not all vehicle seats are designed to support every type of car seat, especially when dealing with active airbags or contoured passenger seats.
Next, conduct a thorough physical inspection of the car seat. Look for any visible signs of damage, such as hairline cracks in the plastic shell, frayed harness straps, or rusted metal components. Check the manufacturer’s label on the back or bottom of the seat to verify the manufacturing date and ensure the seat has not expired or been subject to a safety recall.
Products mentioned in this guide
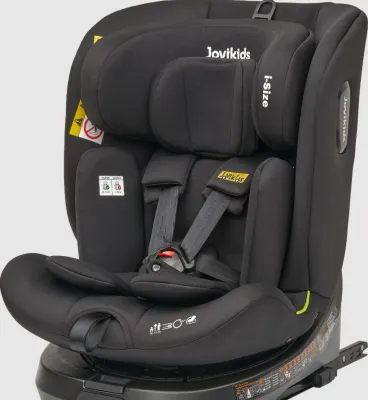
Prices are valid at publication and may change. Please refer to the product page for the latest price.
Finally, prepare the vehicle interior. In warm, humid climates like the Philippines, dust, sand, and small debris can easily accumulate in the crevices of your car seats. Clear this debris completely to prevent it from interfering with the installation mechanisms. Adjust the vehicle seat to the correct recline angle as specified by the manufacturer, keeping in mind your child’s current weight and developmental stage.
Choosing Your Installation Method: ISOFIX vs. Seatbelt
Most modern vehicles feature built-in ISOFIX anchors, which are metal bars welded directly into the vehicle’s frame, typically located in the crease between the vehicle seat back and cushion. You can locate these anchors by looking for small plastic buttons, fabric tags, or by feeling along the seat crease. Confirm in your Jovie manual that your specific model is equipped with compatible ISOFIX connectors before choosing this method.

If your vehicle does not have these anchors—which is common in older car models—or if you need to install the seat in a middle position that lacks dedicated anchors, you must use the vehicle’s seatbelt system. The seatbelt method is also highly versatile when transferring the car seat between different vehicles, such as taxis or family cars that may not have standardized anchor points.
Regardless of which system you choose, you must adhere to a critical safety rule: use either the ISOFIX system or the vehicle seatbelt, but never both at the same time. Combining both systems can alter how the car seat behaves during a sudden stop or impact, potentially placing unsafe stress on the seat’s structure. Only combine them if the manufacturer’s official manual explicitly instructs you to do so for a specific configuration.
Step-by-Step ISOFIX Installation Guide
To begin the ISOFIX installation, extend the connector arms from the base of your Jovie car seat according to the manufacturer’s instructions. Align these connectors directly with the vehicle’s lower ISOFIX anchor points. Push the car seat firmly backward into the vehicle seat crease until you hear or feel a distinct click, indicating that the connectors have latched onto the metal bars.
Once the lower connectors are engaged, you must secure the anti-rotation device. Depending on your specific Jovie model, this will be either a top tether strap or a floor support leg. If your model uses a top tether, route the strap over the back of the vehicle seat and clip it to the designated anchor point in your vehicle, then pull it taut. If your model features a support leg, extend the leg downward until it rests firmly against the vehicle floor, ensuring it is locked into position without lifting the car seat base off the vehicle cushion.
Always verify the connection by checking the built-in visual indicators on the car seat. Many models feature color-changing windows on the ISOFIX arms and the support leg or tether. These indicators typically turn from red to green when a secure, complete lock is achieved. If any indicator remains red, release the connectors and repeat the process.
Step-by-Step Seatbelt Installation Guide
When installing your Jovie car seat with a seatbelt, you must first identify the correct belt path for your child’s riding direction. Car seats use different routing paths for rear-facing and forward-facing configurations. These paths are typically color-coded and labeled directly on the plastic shell of the seat; check your manual to confirm which color corresponds to your current setup.
Thread the vehicle’s lap and shoulder belt through the designated path, taking care to ensure the webbing remains completely flat and free of twists. Buckle the seatbelt into the vehicle’s buckle receiver. To lock the seatbelt in place, pull the shoulder portion of the belt slowly and completely out of the retractor until it stops, then let it feed back in. This action activates the automatic locking retractor (ALR) mode, which prevents the belt from loosening.
To achieve a tight, secure fit, you must compress the vehicle seat cushion. Place your hand or knee firmly into the center of the car seat, applying your body weight to push it down into the vehicle cushion. While maintaining this downward pressure, pull the shoulder belt upward with force to remove all slack from the lap portion, allowing the retractor to feed the excess belt back into the wall.
Final Safety Checks: The Inch and Pinch Tests
Once the installation is complete, you must perform the “inch test” to verify the stability of the car seat. Grab the car seat firmly at the belt path—the exact area where the seatbelt or ISOFIX connectors secure the seat to the vehicle. Shake the seat firmly from side to side and front to back; it should not move more than one inch (2.5 centimeters) in any direction. If it moves more than this, you must tighten the belt or reinstall the ISOFIX connectors.
Next, secure your child in the harness and perform the “pinch test” on their shoulders. Buckle and tighten the harness straps so they fit snugly over your child’s shoulders and hips. Try to pinch the harness webbing horizontally at the collarbone using your thumb and index finger. If you can pinch any excess fabric between your fingers, the harness is too loose and must be tightened further until your fingers slide smoothly off the flat webbing.
Keep in mind that vehicle seat cushions and car seat materials can settle and shift over time, especially during long drives in hot, humid weather. Make it a habit to perform these physical checks periodically to ensure the installation remains secure.
When to Stop and Seek Professional Help
There are times when a do-it-yourself installation should be halted for safety reasons. If you encounter conflicting instructions between your vehicle owner’s manual and the Jovie car seat manual, or if you cannot achieve a secure fit with less than an inch of movement, stop the installation immediately. Do not attempt to use the seat if you suspect any component is malfunctioning or if your vehicle lacks compatible anchor points.
In these situations, seek professional assistance. You can consult a certified child passenger safety technician (CPST) or contact the Jovie customer support team for guidance. A certified professional can inspect your vehicle setup and help you resolve complex installation challenges safely.
Never attempt to fix installation gaps, steep angles, or comfort issues by using unapproved aftermarket accessories, household pillows, rolled-up towels, or extra padding under the car seat. These items are not crash-tested with your Jovie car seat and can compress during a collision, creating dangerous slack that compromises your child’s safety.
Frequently Asked Questions (FAQ)
Can I install the Jovie car seat in the front passenger seat?
Installing a car seat in the front passenger seat carries severe risks due to the rapid deployment of front airbags, which can cause serious injury to a young child. The safest place for children is always in the rear seat of the vehicle. You should only consider a front-seat installation under strict conditions, such as when the vehicle has no rear seats, and only if you can completely deactivate the passenger airbag. Always verify this option against local regulations in the Philippines and the specific instructions in your vehicle’s owner’s manual.
How often should I re-check the car seat installation?
You should perform a quick check of the harness tightness and the seat’s stability every single time you buckle your child in for a ride. A more comprehensive inspection, including checking the ISOFIX indicators or seatbelt tension, should be done at least once a month. Additionally, perform an immediate re-inspection if you experience sudden hard braking, are involved in any minor collision, or after you have removed the seat for cleaning or transferred it to another vehicle.

Community discussion
Share your experience or ask a question. Comments are reviewed before publication.