
Installing a car seat correctly is one of the most critical steps you can take to protect your child during vehicle travel. A secure installation ensures that the car seat remains firmly anchored to the vehicle’s chassis in the event of sudden braking or a collision. Achieving this level of security requires careful attention to detail, a thorough reading of your equipment manuals, and a physical verification of the final setup.
In the warm and humid climate of the Philippines, preparing for this task also means managing your physical comfort. It is highly recommended to park your vehicle in a shaded, well-ventilated area or an indoor garage before beginning. Taking your time without rushing helps prevent fatigue and ensures you do not overlook critical safety steps due to heat or discomfort.
Every car seat and vehicle combination has unique requirements, meaning there is no single universal method that applies to every car. By understanding the specific mechanics of both ISOFIX and seat belt installations, you can confidently choose the method that fits your vehicle and provides the most stable foundation for your child’s travel gear.
Products mentioned in this guide
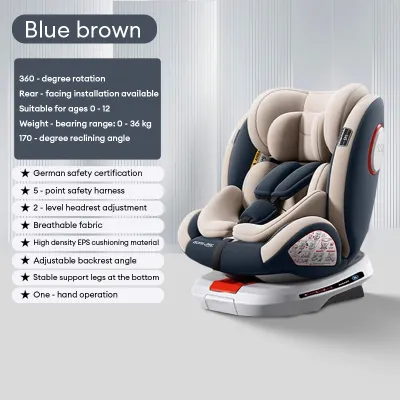

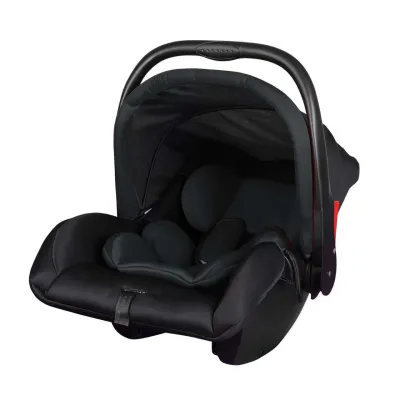
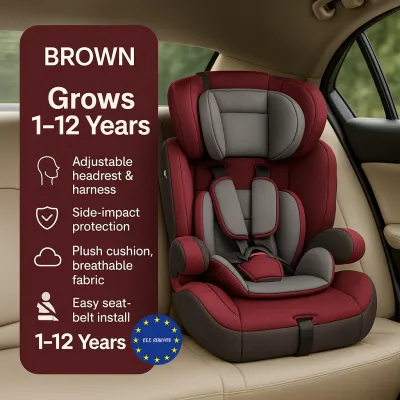

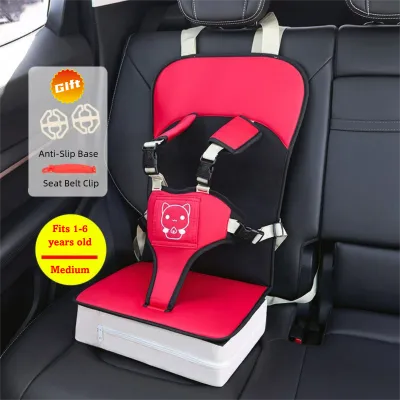

Prices are valid at publication and may change. Please refer to the product page for the latest price.
Before You Begin: Checking Vehicle and Car Seat Compatibility
Before attempting to install any car seat, you must verify that your vehicle and the child restraint system are fully compatible. This process begins with a thorough review of two essential documents: the car seat manufacturer’s instruction manual and your vehicle owner’s manual. These documents contain specific guidelines regarding approved seating positions, weight limits, and installation methods that are unique to your specific models.
To determine if you can use the ISOFIX method, you must locate the lower anchor points in your vehicle. These are typically small metal bars welded directly into the vehicle’s frame, situated deep within the gap between the rear seat backrest and the seat cushion. Many modern vehicles feature small plastic guides, fabric tags, or button indicators marked with an ISOFIX symbol to help you locate these anchors easily. If your vehicle does not have these indicators, run your hand along the seat crease to feel for the metal bars.
Next, you must verify that the car seat is appropriate for your child’s current developmental stage. Check the manufacturer’s labels on the car seat shell to confirm the weight, height, and age limits for both rear-facing and forward-facing configurations. Children grow at different rates, so you must rely on physical measurements rather than age alone to determine when to transition to a different seat style or orientation.
There are specific conditions under which you must stop the installation process immediately and seek professional guidance. If you discover that your vehicle lacks the necessary anchor points, if the vehicle manual explicitly prohibits installation in your preferred seating position, or if the car seat has passed its expiration date, do not proceed. Car seats degrade over time due to heat and UV exposure—factors accelerated by tropical climates—and an expired seat may not perform as intended.
Step-by-Step Guide: Installing with ISOFIX
The ISOFIX system is designed to simplify the installation process by providing a rigid, direct connection between the car seat and the vehicle’s chassis. To begin, place the car seat on the vehicle seat in the correct orientation, ensuring it is flat against the vehicle seat back. Align the car seat’s ISOFIX connectors with the lower anchor points you located during your compatibility check.

Push the car seat backward firmly until you hear a distinct, audible click from both connectors. Most modern ISOFIX systems feature visual indicators near the release buttons that change color, typically from red to green, once a secure connection is established. If these indicators do not change color or if you do not hear the click, pull the car seat forward to verify if the connectors have failed to latch, and try cleaning any debris out of the vehicle’s anchor points before attempting again.
Once the lower anchors are locked, you must attach the top tether strap if you are installing a forward-facing car seat or a compatible rear-facing model. Locate the designated top tether anchor point in your vehicle, which may be positioned on the back of the rear seat, on the floor of the trunk, or on the rear parcel shelf. Route the tether strap over the vehicle seat back, clip it onto the anchor, and pull the strap tightly to eliminate all slack.
After securing both the lower anchors and the top tether, perform a physical movement check. Grasp the car seat near the belt path—the specific area where the connectors attach—and pull firmly from side to side and front to back. The seat should not shift more than one inch (2.5 centimeters) in any direction. If the seat moves excessively, or if the top tether strap cannot reach the anchor point, stop the installation and consult the manufacturer’s manual for alternative routing or adjustment options.
Step-by-Step Guide: Installing with a Seat Belt
When ISOFIX anchors are unavailable, or if your child has exceeded the weight limit specified for ISOFIX use, a seat belt installation is an equally secure alternative. Start by placing the car seat in the desired position and identifying the correct belt path on the car seat shell. Manufacturers color-code these paths—often blue for rear-facing and red for forward-facing—to help you avoid routing errors.
Thread the vehicle’s lap-and-shoulder belt through the designated path, ensuring that the webbing remains completely flat and free of twists. Once the belt is routed through the entire path, insert the latch plate into the buckle until it clicks securely. Pull on the lap portion of the belt to ensure the buckle is fully engaged and will not release under tension.
To lock the seat belt in place, you must activate the vehicle’s locking mechanism, which is typically an Automatic Locking Retractor (ALR). Pull the shoulder portion of the seat belt slowly and steadily all the way out until it stops, then allow it to retract back into the wall. You should hear a clicking sound as the belt retracts, indicating that the retractor has switched to locking mode and will not allow any more webbing to be pulled out.
To achieve a tight fit, apply your body weight directly into the car seat to compress the vehicle’s seat cushion. While pressing down with your knee or hand, pull the shoulder belt upward with force to remove all remaining slack from the lap portion, allowing the excess belt to feed back into the retractor. If your vehicle’s seat belts do not feature an automatic locking mechanism, you must use a metal locking clip, installed within three inches of the buckle, strictly following the car seat manufacturer’s instructions to keep the belt tight.
How to Verify a Secure Installation
Verifying the security of your installation is a vital step that must be performed every single time you prepare to place your child in the car seat. Start by conducting the physical movement test at the belt path. Using your non-dominant hand, grasp the seat firmly at the point where the seat belt or ISOFIX straps pass through the frame and attempt to shake it. If the seat slides or tilts more than one inch in any direction, the installation is too loose, and you must repeat the tightening steps.
For rear-facing installations, you must also verify the recline angle of the car seat. Most models feature a built-in bubble level, a color-coded dial, or a printed line on the side of the shell that must be parallel to the ground. Ensuring the correct recline angle is critical for newborns and young infants, as it prevents their heads from falling forward and obstructing their airways, especially during long drives in warm weather.
Once the seat itself is secure, place your child in the seat and evaluate the harness fit. The harness straps must be routed through the correct slots: at or below the child’s shoulders for rear-facing, and at or above the shoulders for forward-facing. Ensure the chest clip is positioned flat against the child’s chest, level with their armpits, to keep the shoulder straps properly positioned.
Perform the pinch test to confirm the harness is sufficiently tight. Try to pinch the harness webbing vertically at the child’s collarbone using your thumb and forefinger. If you can pinch any excess fabric between your fingers, the harness is too loose, and you must pull the adjustment strap at the front of the seat to tighten it. If you observe any twists in the harness straps or if the chest clip slides down easily, stop and correct these issues before driving.
Common Installation Mistakes and When to Seek Help
Even with careful attention, certain common mistakes can compromise the effectiveness of a car seat. One frequent error is leaving the harness straps too loose or failing to adjust them as the child grows. Another critical mistake is forgetting to attach and tighten the top tether strap on forward-facing seats, which is essential for limiting forward head movement during a sudden stop.
A common misconception is that using both the ISOFIX connectors and the vehicle seat belt simultaneously will provide double the protection. In reality, combining these two methods is generally not recommended because it can alter the crash dynamics and put unexpected stress on the car seat shell during an impact. You must choose one approved method—either ISOFIX or seat belt—unless the car seat manufacturer explicitly states in writing that dual installation is permitted for your specific model.
If you encounter difficulties during the installation, such as a seat belt that refuses to lock, a vehicle seat shape that prevents a flat fit, or confusing manual instructions, do not guess. Stop the process and contact the car seat manufacturer’s customer service department, or seek out a certified child passenger safety technician who can provide hands-on assistance.
Finally, always be aware of the history of your car seat. If your vehicle is involved in a collision, you must evaluate whether the car seat needs to be replaced. Many manufacturers require immediate replacement after any crash, regardless of whether the child was in the seat or if there is visible damage, as internal stress fractures can weaken the plastic structure. Always consult the manufacturer’s specific post-crash guidelines to determine if the seat remains safe for continued use.
Frequently Asked Questions (FAQ)
Can I use both ISOFIX and the seat belt at the same time?
Using both ISOFIX and a vehicle seat belt simultaneously is generally not recommended. Car seats are crash-tested and certified using one installation method at a time, and combining them can alter how the seat absorbs impact forces, potentially causing the shell to fail. Always refer to your specific car seat manual, as you must rely solely on the manufacturer’s approved installation configurations.
Where is the safest position in the car to install the car seat?
The rear seat is widely recognized as the safest location for a child’s car seat, away from active front airbags. When choosing a specific position in the rear, you must consider your vehicle’s layout, the availability of ISOFIX anchors, and the shape of the vehicle seats. A correct, tight installation in an approved outboard position is far safer than a loose or improper installation in the center seat.
How tight should the harness straps be on my child?
The harness straps should be snug enough that you cannot pinch any slack in the webbing at your child’s shoulders. To ensure an accurate fit, always remove bulky clothing, thick jackets, or heavy sweaters before securing your child in the seat, as these materials can compress during a sudden stop and leave dangerous slack in the harness.

Community discussion
Share your experience or ask a question. Comments are reviewed before publication.