
Finding the correct silicone insert size is one of the most critical steps in establishing a comfortable and productive pumping routine. A silicone insert is a soft, flexible sleeve that slides inside a standard breast pump flange to reduce its tunnel diameter, ensuring a snug fit around the nipple. To choose the right size, you must measure the diameter of your nipple base in millimeters, exclude the areola, and add a small clearance margin—typically one to two millimeters—to accommodate natural expansion during expression.
Using an incorrectly sized flange or insert can quickly lead to physical discomfort, reduced milk output, and tissue damage. Because every body is unique, relying on the default flange size that comes in the box often results in an inefficient fit. Taking the time to measure accurately and select the corresponding silicone insert allows you to customize your pump to your specific anatomy, supporting your breastfeeding journey over the long term.
Why the Right Silicone Insert Fit Matters
The primary purpose of a silicone insert is to protect delicate breast tissue while optimizing milk extraction. When a pump operates, the vacuum pulls the nipple into the flange tunnel to mimic a baby’s suckling. If the tunnel is too wide or too narrow, this mechanical pull creates friction against the sensitive skin of the nipple. In warm, humid environments like the Philippines, where skin is already prone to moisture-related irritation and chafing, minimizing friction is essential to prevent painful skin breakdown and blisters.
Products mentioned in this guide
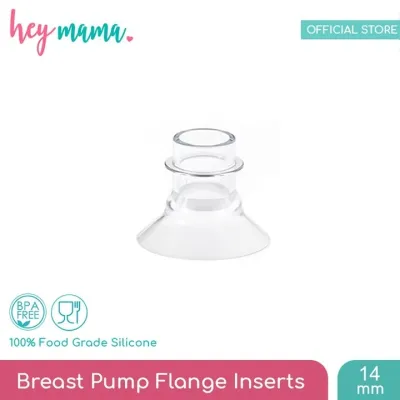
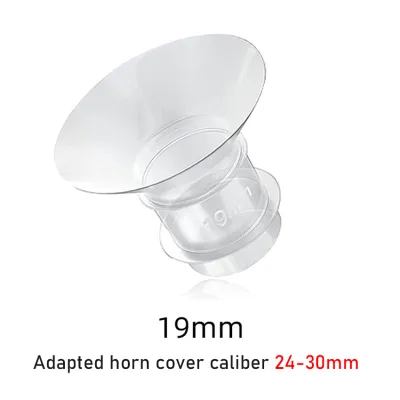
Prices are valid at publication and may change. Please refer to the product page for the latest price.
An optimal fit ensures that the vacuum pressure is applied evenly across the breast tissue, facilitating efficient milk removal. When the insert fits correctly, the pump can stimulate the milk ducts and trigger let-down reflexes without requiring you to crank up the vacuum to uncomfortable levels. Relying on excessive vacuum pressure to compensate for a poor fit does not increase milk yield; instead, it frequently causes micro-tears in the skin and deep tissue bruising.
Furthermore, an ill-fitting insert can cause localized tissue swelling, also known as edema. When the nipple or surrounding areola becomes swollen, the milk ducts within the breast can compress and constrict. This restriction slows down the flow of milk, leading to longer pumping sessions and incomplete breast emptying. Over time, incomplete drainage can signal your body to produce less milk, potentially impacting your overall supply, while also increasing the risk of clogged ducts.
How to Measure Your Nipples for an Insert
Obtaining a reliable baseline measurement is the foundation of choosing the correct silicone insert. To begin, you must measure the diameter of the nipple base itself, completely excluding the surrounding darkened skin of the areola. The goal is to measure only the part of the nipple that will move freely within the insert’s tunnel. Because nipple tissue is highly dynamic, taking this measurement at the right time is crucial for accuracy.

The ideal time to measure your nipples is when your breasts are rested and before you begin a pumping session. Measuring immediately after pumping can yield inaccurate results, as the vacuum action temporarily stretches and swells the tissue. If you are currently pregnant and planning ahead, keep in mind that nipple size can change slightly after birth once your milk fully comes in, making postpartum measurement the most reliable option.
To take the measurement, you can use a flexible sewing measuring tape, a standard ruler with millimeter markings, or a printable sizing guide specifically designed for breastfeeding. If using a ruler, hold it flat against the base of your nipple and look directly into a mirror to read the millimeter width from one side of the base to the other. Printable sizing tools often feature circular cutouts of various millimeter sizes; you simply place these over your nipple to find the circle that fits snugly around the base without compressing the tissue.
Matching Your Measurement to Insert Sizes
Once you have your base measurement, you must match it to the correct product specifications. Most manufacturers of silicone inserts provide detailed sizing charts that correlate your physical measurements with their specific insert sizes. It is important to consult the exact chart for the brand you plan to purchase, as sizing conventions and tolerances can vary slightly between manufacturers.
When selecting your insert size, you must factor in expected nipple expansion during active pumping. Nipple tissue naturally expands in both length and width under the influence of vacuum pressure and warm let-downs. As a general guideline, adding one to two millimeters to your pre-pumping measurement will give you the target inner diameter of the silicone insert. For example, if your rested nipple base measures 15 millimeters, a 17-millimeter silicone insert is often the recommended starting point.
Before purchasing or opening the product, always verify the inner diameter printed on the packaging or product label. Silicone inserts are designed to be compatible with specific outer flange sizes—most commonly standard 24-millimeter or 28-millimeter plastic flanges. Ensure that the insert you select not only matches your nipple measurement but is also designed to fit securely inside the specific brand and size of the plastic flange you currently own. Additionally, verify the manufacturer’s safety warnings and material certifications on the product documentation to ensure the silicone is food-grade and free from harmful chemicals.
Signs Your Silicone Insert Is the Wrong Size
Paying close attention to physical and visual indicators during and after your pumping sessions will help you identify if your silicone insert needs to be replaced. If the insert is too tight, you will likely experience pinching, rubbing, or a sharp burning sensation along the sides of the nipple. Visually, the nipple may appear blanched—turning white or pale at the tip or sides—due to restricted blood flow, and you may notice that the nipple struggles to move freely back and forth within the tunnel.
Conversely, an insert that is too loose presents a different set of issues. When the tunnel diameter is too wide, a significant portion of the surrounding areola will be pulled deep into the insert during each suction cycle. This can cause the skin of the areola to rub against the silicone, leading to swelling, redness, and a loss of the airtight seal required to maintain consistent suction. You might find yourself constantly adjusting the pump or pressing it harder against your breast to keep it in place.
Unexplained changes in your milk output or a sudden increase in the time required to empty your breasts are also strong indicators of an incorrect fit. If a pumping session that normally takes fifteen minutes now takes thirty minutes to yield the same amount of milk, your body may be struggling against a restrictive or overly loose insert. While high-quality silicone inserts are relatively inexpensive—often costing only a few hundred pesos (₱) on local ecommerce platforms—choosing the wrong size can lead to painful complications. If you observe persistent pain, skin cracking, or bleeding, stop using the insert immediately and consult a lactation consultant or healthcare professional to prevent further injury.
Testing and Adjusting the Fit During Pumping
Validating your selected insert size during an active pumping session allows you to assess the fit under realistic conditions. Before starting, apply a thin layer of safe, pump-compatible lubrication to the inside of the silicone insert or directly onto your nipple. A food-grade lubricant, such as pure coconut oil or a specialized lanolin-free nipple balm, helps reduce initial friction and allows the tissue to glide smoothly within the silicone tunnel.
Once the pump is turned on, start at the lowest suction setting and carefully observe the nipple movement during the first few minutes of expression. The nipple should center easily within the insert and move back and forth without rubbing against the walls of the tunnel. The surrounding areola should remain outside the tunnel, with only a minimal amount of tissue drawn in at the very base of the nipple.
Safety should always be your priority during this testing phase. If you experience sharp pain, severe redness, or notice immediate swelling, turn off the pump immediately. Do not attempt to push through the discomfort, as this can cause rapid tissue damage that may take days to heal, disrupting your feeding schedule. If the fit does not feel right, re-measure your nipples or try a different insert size to find a comfortable, pain-free setting.
Frequently Asked Questions (FAQ)
Can I use a silicone insert with any breast pump flange?
Silicone inserts are not universally compatible with every breast pump flange on the market. While many third-party manufacturers design inserts to fit standard 24-millimeter or 28-millimeter plastic flanges, proprietary flange shapes or integrated one-piece breast shield designs may not accommodate them. Always check the manufacturer’s compatibility guidelines to ensure the insert will seat securely without slipping, causing air leaks, or blocking the milk flow path.
Do nipple sizes change over time, requiring different inserts?
Yes, nipple sizes can fluctuate significantly throughout your breastfeeding journey. During the early postpartum weeks, hormonal shifts and fluid retention can cause temporary swelling, which gradually subsides as your milk supply stabilizes. Additionally, the physical stretching from regular pumping sessions can cause gradual changes in tissue elasticity and size, meaning you may need to remeasure and adjust your insert size several times over the months.
Community discussion
Share your experience or ask a question. Comments are reviewed before publication.