
To wear and adjust a Momyso baby carrier safely and comfortably, you must establish a secure foundation around your hips, position your baby in an ergonomically sound “M” shape, and ensure their airway remains completely unobstructed. Mastering the adjustment of your momyso baby carrier protects your baby’s developing spine and hips while distributing their weight evenly across your body. This guide provides a detailed, step-by-step approach to achieving the perfect fit, ensuring every stroll is comfortable for both you and your little one.
Pre-Use Safety Checks: Preparing Your Carrier and Baby
Before placing your baby into any carrier, a thorough safety inspection is essential to prevent accidents and ensure structural integrity. Begin by examining all plastic buckles, zippers, fabric seams, and adjustment straps. Look for any signs of wear, such as frayed stitching, cracked fasteners, or torn fabric. If you notice any damage, do not use the carrier; contact the manufacturer or a professional for assistance.
Next, verify that your baby meets the specific weight, age, and developmental milestones required for your Momyso model. Different models have distinct minimum and maximum weight limits, which are outlined in your product manual. Never assume a baby is ready for a carrier based solely on their age; weight and physical development, such as head control, are the primary indicators of readiness.
Products mentioned in this guide
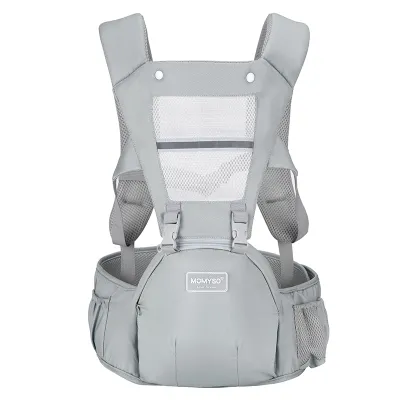
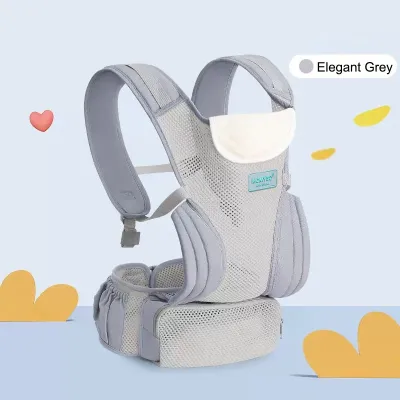
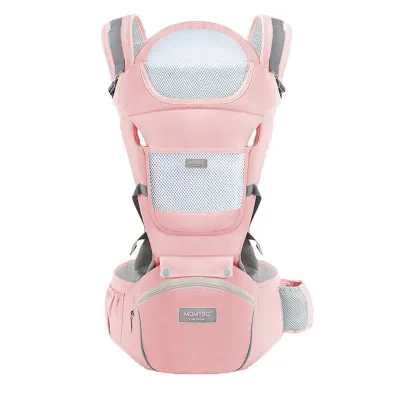
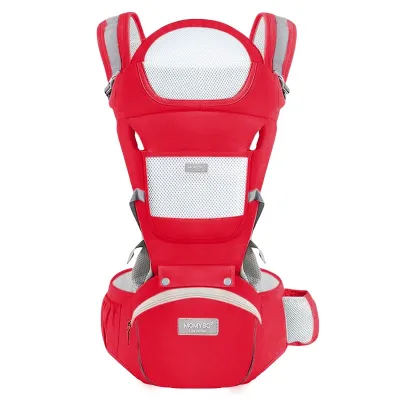
Prices are valid at publication and may change. Please refer to the product page for the latest price.
Dressing your baby appropriately is also critical, particularly in the tropical climate of the Philippines. The high heat index and humidity mean that both your body heat and the carrier’s fabric will warm the baby quickly. Dress your little one in lightweight, breathable clothing made from natural fibers like cotton or bamboo. Avoid bulky outfits, footed sleepers that can pull tightly on their toes when seated, or heavy layers that could cause overheating or interfere with the snug fit of the harness.
Step-by-Step Guide: Securing the Momyso Carrier on Your Body
Establishing a stable foundation on your own body is the key to comfortable babywearing. By securing the carrier correctly before placing your baby inside, you protect your back and ensure the baby sits in a stable, secure pouch.

Securing the Waist Belt or Hip Seat Base
The waist belt is the most important component for weight distribution, as it transfers the baby’s weight to your hips rather than your lower back. Position the waist belt high on your torso, around your natural waist or just above your hip bones, rather than low on your pelvis. This higher placement keeps the baby close to your center of gravity and prevents the carrier from sagging.
Fasten the main buckle securely, listening for an audible click to confirm it is locked. Pull the adjustment straps until the belt is snug and flat against your body. It should be tight enough that it does not slide down when you move or bend your knees, but not so tight that it restricts your breathing or pinches your skin.
If your Momyso model features a structured hip seat, ensure the seat platform is centered on your abdomen and angled slightly upward. This upward angle is designed to support the baby’s bottom and keep their weight sliding naturally toward your chest rather than away from you.
Adjusting and Fastening the Shoulder Straps
Once the waist belt is secure, slip your arms through the padded shoulder straps. Depending on your specific Momyso model, you can configure these straps in either an “H” style (parallel straps) or an “X” style (crossed straps). Crossed straps often provide better weight distribution for parents with narrow or sloping shoulders, while parallel straps are quick to put on.
Reach behind your upper back or neck to fasten the sternum strap, also known as the chest clip. If you struggle to reach it, adjust the height of the clip along the shoulder straps before putting the carrier on. The sternum strap should sit comfortably across your mid-back or shoulder blades, keeping the shoulder straps from sliding outward off your shoulders.
Pull the front shoulder adjustment straps forward or downward to remove excess slack. The fabric panel of the carrier should sit relatively close to your chest, leaving just enough room to safely insert your baby.
Attaching the Headrest or Neck Support
For infants who have not yet developed full head and neck control, utilizing the integrated headrest or neck support panel is mandatory. Unfold the panel or attach it to the designated buttons or snaps on the upper part of the carrier.
Adjust the side tension straps to provide a gentle, firm support along the back of the baby’s skull. The panel should support the head without pushing it forward, which could restrict the baby’s airway.
Always double-check that the headrest fabric does not cover the baby’s mouth or nose. The support should stop at the base of their ears, allowing clear airflow and giving you an unobstructed view of their face.
Positioning Your Baby Safely: Airway and Hip Health Standards
Once the carrier is secured on your body, you can safely place your baby inside. Proper positioning is vital to protect your baby’s developing airway and ensure healthy hip joint development.
The TICKS Rule
The TICKS rule is a globally recognized safety standard for babywearing. Apply these five checks every time you secure your baby in the carrier:
- Tight: The carrier must be adjusted snugly against your body. Loose fabric allows the baby to slump down, which can restrict their breathing and strain your back.
- In view at all times: You should always be able to see your baby's face simply by looking down. Ensure no fabric, hoods, or clothing cover their nose or mouth.
- Close enough to kiss: Your baby's head should be positioned high enough on your chest that you can easily kiss the top of their head by tipping your chin forward.
- Keep chin off the chest: There should always be a space of at least one finger-width under your baby's chin. If their chin is pressed against their chest, it can close their airway and restrict breathing.
- Supported back: In an upright carrier, your baby's back should be supported in its natural "C" curve. The fabric should be taut enough to prevent slumping but flexible enough to accommodate their natural posture.
Hip Health (The “M” Position)
To prevent hip strain and developmental hip dysplasia, your baby’s legs must be supported in an ergonomic “M” position. When seated in the carrier, the baby’s knees should be positioned slightly higher than their bottom, and their thighs should spread naturally around your torso.
The fabric of the carrier seat must extend from one knee crease to the other, fully supporting the thighs. If the seat is too narrow, the baby’s legs will dangle straight down, placing excessive pressure on the hip joints. If the seat is too wide, it may force the knees into an unnatural stretch; adjust the seat width settings on your Momyso carrier to match your baby’s size.
After securing all buckles and adjusting the straps, perform a final visual and physical check. Ensure the baby’s legs are symmetrical, their airway is clear, and all safety buckles are fully locked.
Fine-Tuning for Parent Comfort and Weight Distribution
Even with a high-quality carrier, improper adjustments can lead to shoulder, neck, or lower back discomfort during extended wear. Fine-tuning the straps helps distribute your baby’s weight evenly across your skeletal system.
If you experience pressure or aching in your lower back, the waist belt has likely slipped down or was fastened too loosely. To correct this, temporarily support your baby’s weight with your arms, loosen the waist belt, slide it higher up onto your waist, and pull the strap tightly before letting the baby’s weight rest back down.
If you feel the shoulder straps digging into your shoulders or neck, they may be carrying too much of the load. Try loosening the shoulder straps slightly to allow more of the baby’s weight to transfer down to the padded waist belt. You can also adjust the height of the sternum strap; moving it lower down your back can relieve tension in your neck muscles.
In the warm and humid climate of the Philippines, carrying a baby adds significant thermal warmth to both of you. Take regular breaks to rest, unbuckling the carrier in a safe, cool area so both you and your baby can cool down. Remember to stay hydrated, especially during outdoor walks or errands.
Safely Removing the Carrier and Your Baby
Removing your baby from the carrier requires a careful, deliberate sequence to prevent accidental slips or falls. Never unbuckle the main waist belt while the baby is still inside the carrier.
First, find a safe, flat surface to stand or sit near, such as a bed, sofa, or changing table. Place one arm firmly around your baby’s back and bottom to support their entire weight.
With your free hand, unclip the sternum strap behind your back. Slowly loosen the shoulder straps to create some slack, then carefully slide one arm out of its shoulder strap while keeping your supporting arm securely around your baby.
Carefully lift your baby upward and outward from the carrier panel, transferring them to a safe surface or handing them to another caregiver. Once your baby is safe and secure, you can unbuckle the waist belt and remove the carrier completely.
After use, store your Momyso carrier in a cool, dry, and well-ventilated area. In humid environments, leaving a damp carrier in a closed bag or closet can encourage the growth of mold or mildew on the fabric and foam padding.
Common Fitting Mistakes and How to Fix Them
Understanding common babywearing mistakes allows you to quickly identify and correct issues before they cause discomfort or safety hazards.
- Carrier is too loose: This is the most common mistake, causing the baby to slump down and slide away from your body. Fix: Tighten the shoulder straps and waist belt until the baby is held snugly against your torso, preventing any sagging.
- Forward-facing too early: Parents often turn their babies to face outward before they are developmentally ready. Fix: Keep your baby in the inward-facing position until they have complete, independent neck and head control, and meet the specific age or weight requirements detailed in your Momyso manual.
- Fabric not supporting knee-to-knee: Allowing the baby's legs to dangle straight down puts stress on their developing hip joints. Fix: Adjust the seat width panel or use the recommended infant insert to ensure the fabric supports the baby's thighs from knee crease to knee crease, maintaining the "M" position.
- Ignoring weight limits: Using a carrier when your child is under the minimum weight or over the maximum weight limit compromises safety. Fix: Regularly check your child's weight and transition to a toddler-specific carrier or a stroller once they outgrow the limits of your Momyso model.
Frequently Asked Questions (FAQ)
Can I use a Momyso carrier for a newborn?
Whether you can use a Momyso carrier for a newborn depends entirely on the specific model you own. Some models feature built-in newborn adjustments or require a separate infant insert to safely support a newborn’s head, neck, and hips. Always check the product label and instruction manual to verify the minimum weight requirement—typically around 3.2 kilograms—and ensure your baby meets these criteria before use. If your baby was born prematurely or has health conditions, consult your pediatrician before babywearing.
How do I wash and maintain the carrier?
To preserve the structural integrity and cleanliness of your carrier, spot clean minor spills and drool with a damp cloth and a mild, baby-safe detergent. For a complete wash, consult the care label stitched onto your specific Momyso carrier. If machine washing is permitted, remove any detachable structured parts, such as a foam hip seat base, fasten all buckles, and place the carrier in a mesh laundry bag. Wash on a gentle cycle with cold water and air dry the carrier completely in a well-ventilated, shaded area; avoid using a tumble dryer or direct sunlight, which can degrade the fabric and safety buckles over time.
Community discussion
Share your experience or ask a question. Comments are reviewed before publication.