
Adjusting and wearing your ergobaby 360 baby carrier correctly is essential for ensuring your baby’s safety and your own physical comfort. Whether you are navigating busy city streets, strolling through a local park, or managing daily tasks at home, a proper fit prevents unnecessary strain on your back while keeping your little one securely positioned. In tropical climates like the Philippines, where high heat and humidity are constant factors, mastering these adjustments also helps keep both you and your baby cool and comfortable during extended wear.
While babywearing offers incredible convenience, it requires careful attention to detail. An improperly adjusted carrier can lead to poor infant hip positioning, airway obstruction, or chronic shoulder and lower back pain for the caregiver. By following a systematic approach to securing the waistbelt, adjusting the seat width, positioning your baby, and performing a final safety check, you can confidently enjoy the benefits of hands-free parenting.
Before You Begin: Weight Limits and Safety Boundaries for the Ergobaby 360
Before placing your baby in the carrier, you must establish that your child meets the physical and developmental prerequisites for this specific model. Every baby develops at a different rate, so suitability must never be assumed based on age alone. Always inspect the manufacturer’s label and the official instruction manual for the exact minimum and maximum weight limits applicable to your specific carrier model, as these parameters can vary across different production runs and material versions.
Products mentioned in this guide
![[Ready stock] Ergo baby Ergonomics Baby Carrier Omni 360 All-In-One Cool Air Mesh Newborn to Toddler](https://img.lazcdn.com/g/p/cc70fa8ac281ac1045f596a2c67114af.jpg_400x400q80.jpg_.webp)
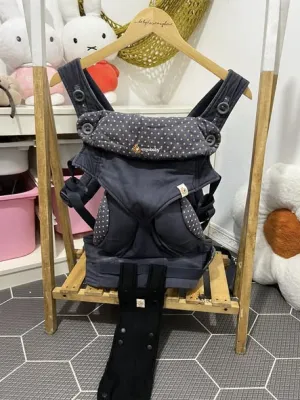
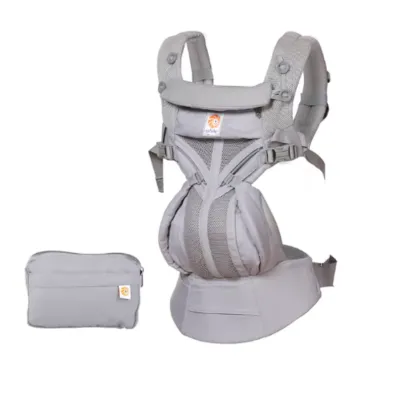
Prices are valid at publication and may change. Please refer to the product page for the latest price.
For younger infants, the inward-facing position is mandatory. If you are using an older or standard version of the carrier, a separate infant insert may be required for newborns and infants who do not yet meet the minimum weight or developmental milestones for the main carrier body. Never attempt a forward-facing (outward-facing) carry until your baby has achieved strong, consistent, and independent head and neck control. This milestone typically occurs around several months of age, but you must verify your baby’s readiness and check the manufacturer’s specific guidelines before changing positions.
Caregiver supervision is a continuous requirement during babywearing. Before every single use, perform a comprehensive visual and physical inspection of the carrier. Check all plastic buckles for cracks or chips, examine the webbing straps for fraying or loose stitching, and inspect the fabric seams for any signs of tearing or wear. If you identify any damage or if any component feels compromised, stop using the carrier immediately and contact the manufacturer or a qualified professional for guidance.
Step 1: Securing the Waistbelt for Lumbar Support
The foundation of a comfortable carry is the waistbelt. The waistbelt is designed to support the majority of your baby’s weight, transferring it from your shoulders to your hips and legs. To achieve this, the placement of the waistbelt must be adjusted based on your baby’s size and the carry position you intend to use.

For newborns and inward-facing carries, the waistbelt should sit high on your natural waist, well above your hips. This high placement ensures that your baby remains positioned high on your chest, close enough for you to monitor their breathing. For older, heavier babies or when using back and hip carries, you may position the waistbelt slightly lower, resting firmly on the top of your hip bones. If you have recently given birth, especially via Caesarean section, consult your healthcare provider before using a structured waistbelt, and ensure the belt is positioned comfortably away from any healing incisions.
To secure the waistbelt:
- Position the belt: Wrap the waistbelt around your torso at the appropriate height. If your model features a wide velcro band, secure the velcro fully and evenly first, then thread the safety buckle through the elastic loop and fasten it until it clicks.
- Tighten firmly: Pull the adjustment strap snugly. The waistbelt must feel tight and secure, acting like a firm support band. If the belt is too loose, it will sag or slide down your hips once you place the baby inside, causing the shoulder straps to pull painfully against your neck.
- Align the lumbar pad: Ensure the supportive lumbar pad is centered on your lower back for front carries. If your specific model or carry position requires moving the pad to a different position, consult your product manual to verify the correct configuration.
Step 2: Adjusting the Seat for Healthy Hip Positioning
The ergobaby 360 is specifically designed to support healthy hip development, but this benefit is only realized if the seat is adjusted correctly for your baby’s size. Improper leg positioning can place undue stress on developing hip joints, increasing the risk of hip dysplasia.
The goal is to maintain the ergonomic “M-shape” or “froggy” position. In this position, the baby’s knees must be supported higher than or level with their bottom, and their thighs should spread naturally around the parent’s torso. The fabric of the carrier seat must extend from the back of one knee crease to the back of the other knee crease, providing complete thigh support without digging into the calves or forcing the legs to stretch too wide.
To adjust the seat width on the classic carrier, use the built-in button system:
- Wide Seat Setting (Black Buttons): Use the outer black buttons for inward-facing, hip, and back carries. This setting provides the wide base necessary to support the thighs of older infants and toddlers in the M-position.
- Narrow Seat Setting (Grey Buttons): Use the inner grey buttons when configured for the outward-facing (forward-facing) position. This narrows the seat base, allowing the baby's legs to hang forward naturally without restricting circulation or forcing the hips into an unnatural alignment.
Additionally, adjust the neck and head support cushion at the top of the carrier panel. For younger babies who need extra stabilization, button the cushion upward to support the base of the skull. When your baby is older, awake, and looking around, button the cushion downward to allow freedom of movement. Always ensure the cushion is adjusted so that it never pushes your baby’s chin downward toward their chest, which can compromise their airway.
Step 3: Positioning Your Baby and Fastening the Straps
With the waistbelt and seat configured, you are ready to place your baby into the carrier. This process should be done calmly, ideally over a soft surface like a bed or couch if you are still building confidence.
Start by holding your baby securely against your chest in the desired position. Use a gentle “scooping” motion to guide your baby’s bottom deep into the pocket of the carrier seat. Ensure their pelvis is tilted slightly forward so their weight rests on their bottom rather than their crotch, and confirm that their back curves naturally in a soft “C-shape” against your torso.
While supporting your baby with one hand, use your other hand to pull the carrier panel up over their back. Slide one shoulder strap over your shoulder, switch your supporting hand to hold the baby through the fabric panel, and slide the second shoulder strap over your other shoulder.
Next, locate the chest clip (sternum strap) behind your shoulders:
- Fasten the clip: Reach behind your neck or upper back to fasten the chest clip. It should sit comfortably at mid-back or shoulder blade level. You can slide the clip up or down along the shoulder strap webbing to find the most comfortable position.
- Tighten the shoulder straps: Pull the adjustment straps forward or backward (depending on your specific model's buckle orientation) to tighten the shoulder straps. Tighten them evenly on both sides until your baby is held snugly against your body.
- Check strap routing: If your specific model allows for crossed shoulder straps (often preferred by caregivers with narrower shoulders to prevent the straps from slipping or rubbing under the armpits), consult your manual for the exact routing and buckling sequence.
Step 4: The Final Airway and Comfort Check
Once your baby is secured, you must perform a quick safety and comfort assessment. This final check ensures that your baby’s airway is completely unrestricted and that the weight is distributed evenly across your body.
First, apply the classic “close enough to kiss” rule. Look down at your baby’s head; you should be able to easily kiss the top of their head simply by tipping your chin downward. If your baby is positioned too low on your chest, remove the baby, reposition the waistbelt higher on your torso, and try again.
Second, verify the airway. Ensure there is at least a finger’s width of space between your baby’s chin and their chest. If the chin is pressed tightly against the chest, it can restrict their breathing. Check that no fabric, clothing, or accessories are covering your baby’s nose or mouth. In the warm and humid climate of the Philippines, monitor your baby closely for signs of overheating, such as flushed skin, sweating, or rapid breathing. Ensure both you and your baby are wearing lightweight, breathable cotton clothing to prevent heat rash and discomfort.
Finally, take a short walk around the room for a minute or two. Pay attention to how the weight feels on your shoulders and lower back. If you feel localized pressure points, you may need to adjust the tension of the shoulder straps or slightly raise the waistbelt. The baby’s weight should feel balanced and integrated with your center of gravity.
Troubleshooting Common Fit Issues
Even with careful adjustment, you may encounter minor discomforts or fit issues. Most common problems can be resolved with quick, targeted adjustments:
- Parent lower back pain: This is almost always caused by a waistbelt that is secured too loose or too low. If the waistbelt sags, the baby's weight pulls forward, straining your lumbar muscles. To fix this, remove your baby, raise the waistbelt higher on your waist, and tighten it more firmly before placing your baby back inside.
- Baby slumping or leaning to one side: This indicates that the shoulder straps are too loose or unevenly tightened. Ensure both straps are pulled to equal tension so your baby's spine remains centered and supported. Also, double-check that the seat width setting matches your baby's current size.
- Chafing behind the baby's knees: If the edge of the carrier seat rubs against your baby's calves or knees, the seat may be too wide, or their clothing may be bunched up. Ensure the fabric ends exactly at the knee crease, allowing the lower leg to swing freely. Smooth out any folds in their clothing inside the carrier.
Frequently Asked Questions (FAQ)
When is it safe to carry my baby facing outward in the Ergobaby 360?
You should only transition your baby to the outward-facing (forward-facing) position once they have achieved full, independent head and neck control, and meet the specific minimum weight and height requirements outlined in your product’s official manual. This developmental stage typically occurs around five to six months of age.
Always verify these physical milestones rather than relying solely on age. When carrying your baby outward-facing, you must adjust the seat to the narrow setting (using the inner grey buttons) to maintain proper leg support. Limit outward-facing sessions to short intervals of 10 to 20 minutes to prevent overstimulation and caregiver back fatigue. If your baby shows signs of sleepiness or falls asleep, immediately switch them back to the inward-facing position to ensure their head is supported and their airway remains completely open and safe.
Community discussion
Share your experience or ask a question. Comments are reviewed before publication.