
As your little one transitions from crawling to taking their first steps, securing your home becomes an urgent priority. Choosing the right gate for baby safety is not a one-size-fits-all decision; the ideal barrier depends entirely on where it is placed. For high-risk areas like the top of the stairs, a hardware-mounted gate is a non-negotiable safety requirement. Meanwhile, standard doorways and high-traffic kitchen entryways allow for more flexible options, such as pressure-mounted tension gates or multi-panel modular barriers.
In the Philippines, home layouts often present unique architectural challenges. From solid concrete walls and polished wooden banisters to wide open-concept living spaces, understanding how different gate styles interact with your home’s structure is essential. This guide breaks down the specific gate types required for stairs, doorways, and kitchens, helping you make an informed decision that protects your child while preserving your home’s interior.
Evaluating a Gate for Baby: Hardware-Mounted vs. Pressure-Mounted
To build a secure environment, you must first understand the two primary mounting mechanisms available on the market.
Products mentioned in this guide
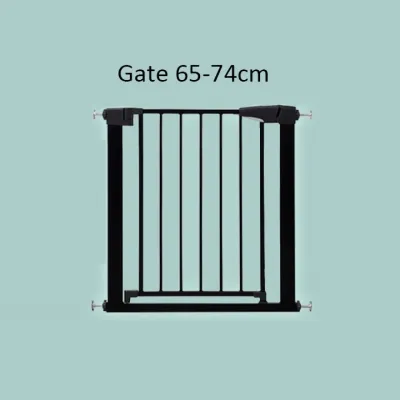
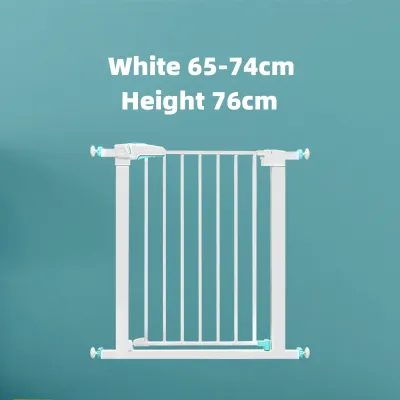
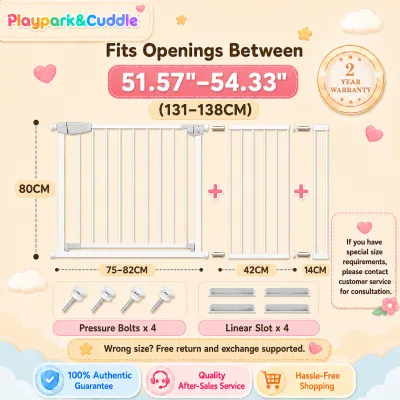
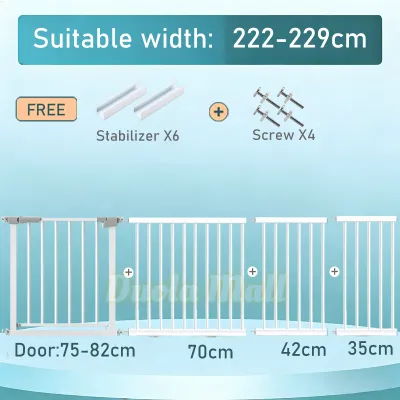
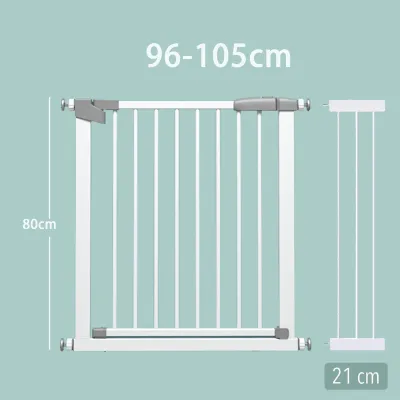
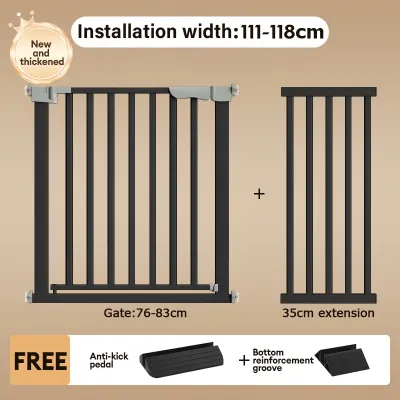
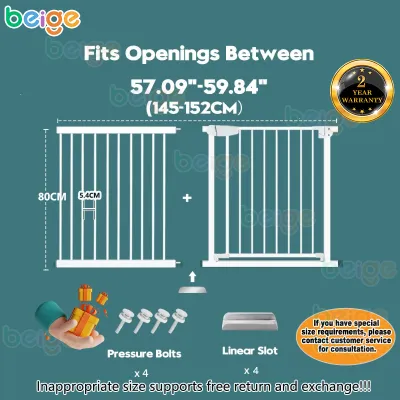
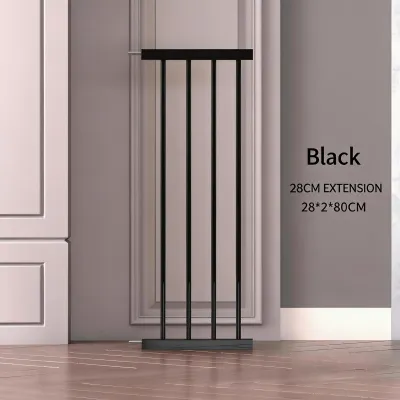
Prices are valid at publication and may change. Please refer to the product page for the latest price.
Hardware-mounted gates are physically screwed into your home’s structure, such as wall studs, door frames, or wooden banisters. This permanent attachment provides the maximum possible security because the barrier cannot be easily dislodged, even if a heavy toddler throws their full weight against it. While installation requires tools and leaves permanent screw holes, this method is the gold standard for structural integrity.
In Philippine homes, where walls are frequently constructed from solid concrete or hollow blocks rather than drywall, installing these gates requires a masonry drill bit, plastic wall plugs (tox), and heavy-duty screws to ensure a flush, unyielding hold. In the local market, robust hardware-mounted options typically range from ₱3,000 to ₱6,000 depending on the materials and brand. While this requires a higher upfront investment and more labor-intensive installation, the safety payoff in high-risk zones is invaluable.
Pressure-mounted gates, by contrast, rely on tension and friction to stay in place. They feature adjustable tension screws with rubber pads on each corner that press tightly against opposite walls or door frames. The primary benefit of this design is convenience: they do not require drilling, making them highly popular among renters or families wishing to preserve expensive wooden door frames. Simple pressure-mounted gates are widely available on local ecommerce platforms, typically ranging from ₱1,000 to ₱2,500.
However, because they rely solely on friction, they can slip or slide if subjected to sudden, heavy impacts. This difference leads to a critical safety baseline: pressure-mounted gates must only be used on flat, level ground where a fall hazard does not exist. They are entirely unsuitable for the top of stairs or any elevated drop. If a pressure-mounted gate fails under pressure, the child and the gate could tumble down together, causing severe injuries.
Choosing the Safest Baby Gate for Stairs
Staircases represent the highest-risk zone in any multi-level household. Securing them requires strict adherence to safety standards and a clear understanding of how to manage both the top and bottom of the steps.

Top of the Stairs: Non-Negotiable Hardware Mounting
The edge of a downward staircase is a zero-tolerance zone for structural failure. Only hardware-mounted gates are acceptable at the top of the stairs. If a child leans, pushes, or shakes the gate, a pressure-mounted model can easily slide out of alignment and collapse, leading to a catastrophic fall.
Beyond the mounting method, the gate’s design features must be evaluated carefully. A safe top-of-stair gate must include a “swing-stop” or one-way opening mechanism. This physical stopper ensures that the gate door can only swing inward toward the landing, never outward over the open steps. If the door were allowed to swing over the stairs, an adult or child leaning on an unlatched gate could fall forward down the flight.
Another vital consideration is the threshold of the gate. Many pressure-mounted and some poorly designed hardware gates feature a solid metal bottom bar that remains on the floor when the gate is open. At the top of the stairs, this bottom bar is a major trip hazard. An adult carrying a sleeping baby or a basket of laundry could easily catch their foot on this bar, leading to a dangerous fall. Therefore, ensure any gate chosen for the top of the stairs has a completely flush threshold, leaving the floor entirely clear when the gate is swung open.
Before finalizing your purchase, verify that the gate meets current international safety certifications as indicated on the manufacturer’s label. Never infer suitability from a product name alone; always consult the specific product documentation to confirm the gate is rated specifically for top-of-stairs use.
Bottom of the Stairs and Banister Adaptations
The base of the staircase requires a slightly different approach. While a hardware-mounted gate is still the preferred and safest option here, a high-quality pressure-mounted gate may be used under specific conditions. It must be positioned far enough forward from the bottom step so that if a child does manage to pull it down, they do not tumble backward onto the steps, and the gate itself does not block the first tread.
A common challenge in Philippine homes is mounting a gate where one or both sides consist of decorative wooden banisters, iron railings, or rounded spindles. Screwing directly into polished hardwood banisters can permanently ruin expensive woodwork, while drilling into iron is highly impractical.
To solve this, look for manufacturer-approved banister installation kits or Y-spindle adapters. Y-spindles replace the standard flat tension pads on pressure gates, wrapping securely around rounded wooden or metal posts. Alternatively, you can strap a flat wooden mounting board tightly to the banister using heavy-duty zip ties or specialized straps, and then screw the hardware-mounted gate directly into that board. This creates a flat, structurally sound surface without drilling a single hole into your staircase woodwork.
Selecting Gates for Standard Doorways and Hallways
Standard interior doorways and hallways are ideal locations for pressure-mounted gates. Because these areas are on flat, level ground, the risk of a catastrophic fall is absent, making convenience and wall preservation the primary decision drivers.
For renters or those with delicate wooden door frames, pressure-mounted gates are highly recommended because they can be installed and removed without leaving a trace. However, because these areas see high daily foot traffic, look for gates featuring dual-direction opening and an auto-close mechanism. An auto-close gate uses gravity or a spring-loaded hinge to swing shut and lock automatically behind you, which is incredibly helpful when walking through with your hands full of groceries or baby supplies.
When installing a gate in a hallway, baseboards and uneven wall surfaces can present alignment challenges. If the bottom of the wall has thick decorative trim (skirting boards) and the top is bare concrete or drywall, the gate will sit at an angle, compromising its stability. To fix this, use adjustable tension knobs to compensate for the difference in width, ensuring the gate frame remains perfectly vertical. Wall protectors—soft rubber cups that sit between the tension screws and the wall—can also distribute the pressure over a larger surface area, preventing the gate from crushing or cracking your baseboards and paint.
If your hallway or doorway is wider than standard measurements, do not attempt to stretch a gate beyond its limits. Instead, purchase official extension kits from the gate’s manufacturer. These interlocking metal panels slide securely into the main frame, maintaining structural stiffness without introducing weak points. Always check the manufacturer’s instructions to see the maximum number of extensions allowed for that specific model, as adding too many can compromise the gate’s stability.
Managing Wide Openings and the Kitchen
The kitchen is full of potential hazards, from hot stoves and sharp utensils to spilled liquids on tiled floors. Restricting access to this zone is crucial, but open-concept designs and wide archways common in modern homes require specialized barriers.
Accommodating Wide Kitchen Entryways
Modern Philippine homes often feature open-plan kitchens that flow directly into the dining or living areas. Standard single-panel gates are usually too narrow for these wide spaces. To secure these areas, look for multi-panel, modular, or extra-wide hardware-mounted gates.
These modular systems consist of several interlocking panels that can be angled to fit irregular spaces, wrap around kitchen islands, or section off an entire corner of a room. For these wide spans, hardware mounting is highly recommended because the length of the barrier increases the leverage a child can apply; a pressure-mounted gate stretched across a wide space is highly unstable.
To maintain a connected feel and keep an eye on your child, choose gates with widely spaced vertical bars (ensuring the gaps are under 6 centimeters to prevent head entrapment) or heavy-duty mesh panels. These designs allow natural light to flow through your home while ensuring you can easily supervise your child from the cooking area.
High-Traffic Features for Busy Households
Because the kitchen is a high-traffic hub, the gate’s opening mechanism must balance child security with adult convenience.
Avoid step-over barriers in the kitchen. Having to lift your leg over a solid frame while carrying hot dishes, boiling water, or heavy pots is an accident waiting to happen. Instead, prioritize walk-through doors that open fully, leaving a clear path.
Look for hands-free or easy-latch mechanisms. Some models feature foot pedals that release the latch, while others use a simple squeeze-and-lift handle that can be operated easily with one hand. Always verify that the latch mechanism is complex enough to defeat a toddler’s growing problem-solving skills. Dual-action latches—which require pushing a button while simultaneously lifting the gate—are ideal because they require hand span and coordination that young children do not possess.
Cross-Room Versatility and Ongoing Safety Checks
As your child grows and their motor skills develop, your home safety needs will evolve. However, assuming a single gate can be easily moved from room to room without planning can lead to dangerous safety gaps.
Evaluating Cross-Room Compatibility
It is a common misconception that a baby gate is universally interchangeable. A pressure-mounted gate purchased for a bedroom doorway cannot be safely repurposed for the top of the stairs later on. Similarly, a wide modular kitchen gate will not fit a narrow bathroom door frame without purchasing entirely different hardware or removing panels. When purchasing a gate, buy it specifically for its intended location and mounting requirements.
Routine Maintenance and Safety Checklist
Even the highest-quality gate can become unsafe over time due to daily wear, house settling, or children pulling on the bars. Implement a weekly safety check routine:
- Test Tension: For pressure-mounted gates, push firmly on the frame to ensure it has not slipped or loosened on the wall.
- Inspect Screws: For hardware-mounted gates, check that the screws are tightly seated in the wall studs or concrete anchors. Repeated slamming can loosen screws over time.
- Check the Latch: Ensure the locking mechanism engages automatically and securely. If the latch sticks or fails to click into place, clean any dust or debris from the mechanism, or contact the manufacturer for replacement parts.
- Examine the Frame: Inspect the bars and joints for any bending, cracking, or splintering, especially if you are using wooden gates in humid tropical environments.
When to Retire or Replace Your Gate
Baby gates are designed for specific developmental windows. You must retire or replace a gate immediately if:
- The locking latch is compromised, worn down, or can be easily opened by your child.
- The frame is bent, cracked, or showing signs of structural fatigue.
- Your child reaches the manufacturer’s stated maximum height or weight limit.
Most standard gates are rated for children up to 24 months of age, or roughly 30 to 35 inches (76 to 89 cm) tall. Once a child’s chest is higher than the top rail of the gate, or once they demonstrate the ability to climb over it, the gate is no longer an effective barrier and can become a climbing hazard itself. At this stage, transition to active supervision and teaching stair safety. Remember that no gate replaces active caregiver supervision; always monitor your child closely around potential hazards.
Frequently Asked Questions (FAQ)
At what height or age should I stop using a baby gate?
Always refer to the specific manufacturer’s documentation for exact limits. Generally, you should stop using a baby gate when your child reaches approximately 35 inches (89 cm) in height, weighs more than the gate’s rated capacity, or learns how to climb over or open the latch. At this developmental milestone, the gate ceases to be a safe barrier and can become a falling hazard if the child attempts to scale it.
Can I install a hardware-mounted gate into drywall without a stud?
No, standard plastic drywall anchors are not strong enough to support a hardware-mounted gate. The dynamic force of a toddler pushing, pulling, or leaning on the gate will quickly tear standard anchors out of the drywall. You must anchor the gate into a wooden or metal stud on at least one side. If a stud is not available where you need to mount the gate, secure a wooden mounting board to the studs first, and then screw the gate’s hardware directly into that board. For solid concrete walls typical in the Philippines, always use heavy-duty masonry wall plugs (tox) and screws.
Community discussion
Share your experience or ask a question. Comments are reviewed before publication.