
Finding the right Small diaper for your baby often requires testing how different brands handle moisture, fit, and skin sensitivity in real-world conditions. Because every baby has a unique body shape and skin type, there is no single universal winner among Bean Cloud, Pampers, and Huggies. Instead of relying on generic claims, this guide helps you evaluate the actual performance of these Small diapers based on your baby’s specific needs, providing a clear framework to compare absorbency, comfort, and overall value before committing to a bulk purchase. In the warm and humid climate of the Philippines, finding a diaper that balances reliable containment with excellent breathability is essential for keeping your little one comfortable throughout the day and night.
Understanding Small Diaper Design and Sizing
To establish a proper baseline fit, parents must first understand how to read and interpret the sizing standards printed on diaper packaging. While ‘Small’ is a standard industry category, the actual weight and age guidelines vary between Bean Cloud, Pampers, and Huggies. You should always check the specific weight range listed on the package—typically starting around 4 to 8 kilograms—rather than assuming one brand’s Small will fit exactly like another’s. A baby’s developmental stage also plays a role, as a more active infant may require a different structural cut than a newborn who spends most of the day lying down.
Identifying the primary design focus of each brand requires looking closely at their material descriptions and structural claims. Some manufacturers design their Small diapers with an ultra-thin profile to maximize flexibility, while others prioritize a thicker, highly absorbent core or a pocketed waistband to contain runny stools. By reading the product specifications on the packaging, you can determine whether a diaper emphasizes lightweight breathability, heavy-duty overnight protection, or a contoured fit designed to prevent chafing during movement.
Products mentioned in this guide
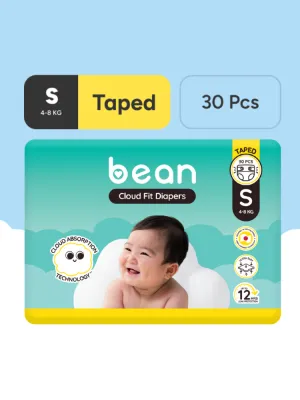
![[Bundle of 2] bean Cloud Fit Taped Diapers Small (4-8 kg) - 60 pcs](https://img.lazcdn.com/g/p/478688985ce425555446352d186aea3a.png_400x400q80.png_.webp)
![[Bundle of 3] bean Cloud Fit Taped Diapers Small (4-8 kg) - 90 pcs](https://img.lazcdn.com/g/p/b02dce3dccb4c1145554d2b070784475.png_400x400q80.png_.webp)
![[Bundle of 5] bean Cloud Fit Taped Diapers Small (4-8 kg) - 150 pcs](https://img.lazcdn.com/g/p/54a7112e7b384e7fb7fbe728673080fe.png_400x400q80.png_.webp)
![[Bundle of 4] bean Cloud Fit Taped Diapers Small (4-8 kg) - 120 pcs](https://img.lazcdn.com/g/p/003af5da1264126f10fd167d8f93d084.png_400x400q80.png_.webp)
Prices are valid at publication and may change. Please refer to the product page for the latest price.
Before putting a diaper on your baby, take a moment to inspect its physical dimensions, cut shape, and tape placement. Laying different brands flat next to each other often reveals noticeable differences in crotch width, rise height, and the elasticity of the side panels. A diaper with a narrower crotch may allow for easier leg movement but might offer less coverage, whereas a higher rise at the back provides a larger barrier against blowouts. The design of the fastening tapes—whether they are wide, rounded, or highly textured—also affects how securely the diaper wraps around your baby’s waist.
Recognizing when your baby is reaching the limits of the Small size range is crucial for preventing leaks and discomfort. If your baby’s weight is near the upper limit printed on the packaging, you may notice that the fastening tapes must be secured near the very edges of the front landing zone. Other signs of a tight fit include the waistband sitting too low on the belly or the diaper failing to fully cover the baby’s backside. Anticipating these fit issues allows you to transition to the next size before experiencing frequent diaper failures.
Evaluating Absorbency and Leak Protection
Evaluating how a diaper manages moisture involves observing its physical performance during daily activities and long stretches of sleep. Wetness indicators are a highly convenient feature found on many modern diapers, typically consisting of a pH-sensitive strip that changes color when exposed to liquid. To assess their reliability, observe how quickly the indicator responds to wetness and whether the color change remains clear and distinct across different brands. Some indicators run the entire length of the diaper, making it easy to check wetness from both the front and the back without fully undressing your baby.

Leak guards and leg cuffs serve as the primary physical barriers against messes, making their structure and placement incredibly important. When changing your baby, always verify that the inner leg cuffs are fully flared outward rather than tucked inward against the skin. During active play or tummy time, observe how these cuffs conform to your baby’s thighs; gaps in this area are a primary cause of leaks. A well-designed leg cuff should maintain a gentle but secure seal that moves with your baby without gaping or collapsing under pressure.
Assessing overnight dryness requires checking the diaper’s surface feel after several hours of continuous wear. When you perform a nighttime diaper change, gently press a dry tissue against the inner lining to see if any moisture transfers back to the surface. A high-performing core should lock liquid away efficiently, leaving the top sheet feeling relatively dry to the touch. You can also look for visual signs that a diaper has reached its maximum capacity, such as a heavy, sagging core or a gel-like swelling beneath the outer cover.
Recognizing the red flags of poor absorbency helps you adjust your changing schedule or switch to a more suitable diaper structure. Compression leaks occur when moisture is squeezed out of a saturated diaper core by the baby’s body weight, such as when they are sitting in a high chair or strapped into a stroller. If you notice frequent dampness on your baby’s clothes despite a secure fit, it may indicate that the diaper’s absorption speed cannot keep up with your baby’s output, requiring more frequent changes or a diaper with a faster-acting distribution layer.
Assessing Fit, Comfort, and Skin Health
Monitoring how a diaper’s materials and elasticity interact with your baby’s skin is essential for maintaining comfort and preventing irritation. Immediately after removing a diaper, carefully inspect your baby’s waist and thighs for any red marks, deep indentations, or localized redness. These marks indicate that the elastic bands are either too tight, the diaper is fastened too snugly, or the cut of that specific brand is too narrow for your baby’s body shape. If red marks persist long after the diaper is removed, it is a clear sign to adjust the fastening technique or try a different brand with softer, more forgiving elasticity.
In the warm and humid climate of the Philippines, the softness and breathability of a diaper’s inner lining and outer cover are critical factors. You can compare these materials by directly touching the diapers to evaluate their texture, stiffness, and flexibility. A diaper with a stiff, plastic-like outer shell can trap heat and sweat against your baby’s skin, increasing the risk of discomfort. Look for materials described as micro-perforated or cloth-like, which promote better airflow and help keep the diaper environment dry and cool.
Friction and chafing can occur when a baby’s active movements cause the diaper’s edges to rub against sensitive skin. Keep a close eye on the groin folds and the area around the waistband for early signs of chafing or mild diaper rash. These issues are often linked to rough synthetic materials, stiff fastening tabs, or inadequate ventilation within the diaper. If you notice persistent irritation in these specific areas, it may be helpful to switch to a brand that features softer edge materials or a more seamless waistband design.
Properly adjusting the tape tabs and waistband is key to achieving a secure yet comfortable fit that moves naturally with your baby. When fastening the diaper, aim to position the tape tabs symmetrically on the front landing zone to ensure even tension across the waist. A good rule of thumb is to leave enough space to comfortably slide two fingers between the diaper waistband and your baby’s tummy. This balance prevents the diaper from being too restrictive while still maintaining a gap-free seal that prevents leaks during movement.
Calculating Cost and Sourcing in the Philippines
Managing your household budget requires a clear understanding of the true financial value of each diaper brand. To compare costs accurately, always calculate the cost per piece by dividing the total package price by the number of diapers inside. This simple calculation prevents you from being misled by different packaging sizes, as a larger box may not always offer a lower unit cost than a medium-sized pack. Keep a running log of these unit prices to identify which brand fits best within your monthly baby care budget.
Investing in trial packs or smaller packaging sizes is a highly recommended strategy when testing a new brand for the first time. Buying a massive bulk box before verifying how the diaper fits your baby or how their skin reacts can lead to unnecessary waste and expense. Once you have confirmed that a specific brand performs well, fits securely, and does not cause irritation, you can confidently transition to purchasing larger bulk boxes or multi-pack bundles to take advantage of long-term savings.
To ensure you are purchasing authentic products that have been stored in proper conditions, always source your diapers from authorized sellers, official brand stores, or reputable local supermarkets. Diapers stored in poorly ventilated, high-humidity environments can absorb moisture from the air before they are even opened, which can compromise their absorbency and wetness indicators. Purchasing from official channels also protects you from counterfeit products that may use substandard materials or lack proper quality control.
When ordering diapers from online marketplaces or ecommerce platforms, remember to factor in additional expenses such as shipping fees and minimum spend requirements. Many online stores offer bundle discounts, seasonal promotions, or free shipping vouchers that can significantly lower the overall cost per piece. Comparing the total checkout price—including shipping—against the prices at your local supermarket ensures you are getting the best possible deal for your preferred diaper brand.
Decision Framework: Which Small Diaper to Choose
Choosing the right Small diaper comes down to matching a brand’s specific design characteristics with your baby’s unique daily needs and body shape. You may want to choose Bean Cloud if your primary focus is on finding a diaper with a lightweight feel, a specific material texture, or a flexible fit profile that accommodates your baby’s natural movements. Parents who prefer a softer, highly pliable diaper often find that this brand aligns well with their preferences for daily wear.
On the other hand, Pampers may be the ideal choice if you prioritize widespread availability across local supermarkets, convenience stores, and online platforms, along with a familiar elastic fit and a highly visible wetness indicator. This brand is often favored by families who value a consistent, easily accessible option that can be purchased quickly during routine grocery trips. Its classic cut and elastic side panels provide a reliable baseline fit for many baby builds.
You might prefer Huggies if your baby has a specific body shape or movement pattern that benefits from a highly structured waistband, secure leg cuffs, or a pocketed design to contain runny stools. This brand is often selected by parents whose babies are highly active or prone to back blowouts, as the distinct waistband structure helps keep messes contained. Evaluating how your baby moves and where leaks typically occur will guide you toward the brand with the most effective structural support.
Regardless of which brand you choose to test first, always verify how your baby’s skin responds to the materials. If your baby has highly sensitive skin, known allergies, or a history of severe diaper rash, consult a pediatrician before making any major changes to their diapering routine. Testing a minimal pack size under close supervision allows you to monitor for any adverse reactions, ensuring your baby remains comfortable, dry, and healthy.
Frequently Asked Questions (FAQ)
When is the right time to transition from Small to Medium diapers?
You should consider transitioning to Medium diapers when you notice frequent leaks despite securing the diaper correctly, or when the fastening tapes struggle to reach the center of the landing zone. Physical signs such as deep red marks on your baby’s thighs or waist also indicate that the diaper has become too restrictive. Additionally, if your baby’s weight is approaching the upper limit printed on the Small diaper packaging, it is a clear signal to prepare for the next size up.
Is it safe to alternate between different diaper brands for day and night use?
Yes, alternating between different diaper brands is a safe and common practice for many families. You might choose a lighter, highly breathable brand for frequent daytime changes to keep your baby cool, and a higher-capacity brand with a more robust core for uninterrupted overnight sleep. When doing this, monitor your baby’s skin to ensure they do not experience sensitivity from switching between different inner lining materials, and verify that both brands fit securely to prevent leaks.
Community discussion
Share your experience or ask a question. Comments are reviewed before publication.